5 CUL PV Wire Mistakes That Cause Inspection Failures
- Waseem Raheel
- Feb 2
- 14 min read

What is CUL PV Wire? Understanding the Solar Cable Standard

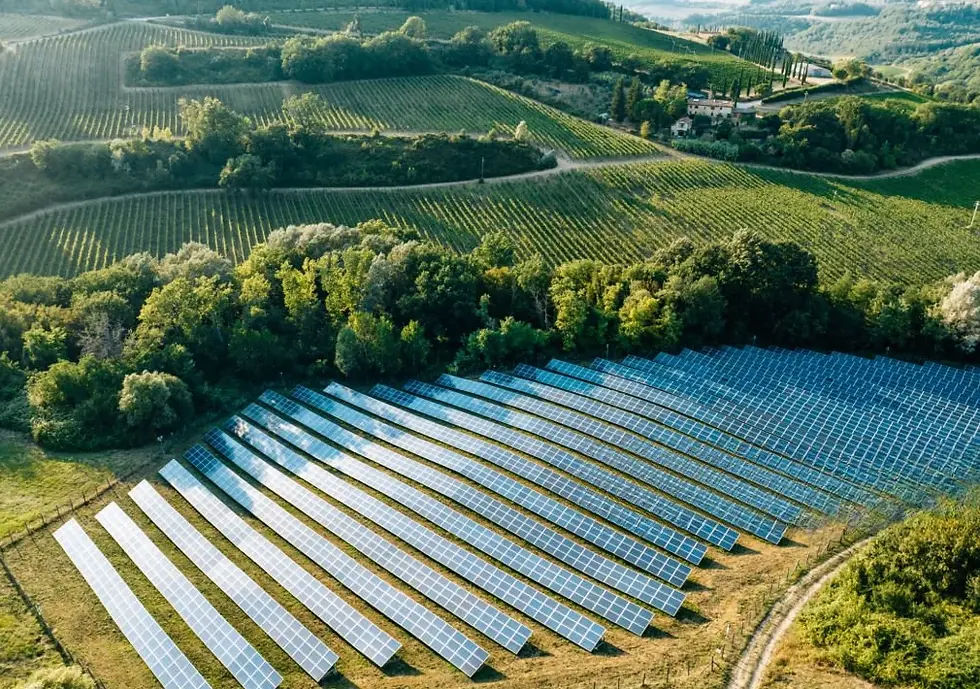
In the rapidly expanding U.S. solar market, selecting the correct wiring is not just about efficiency—it's a critical safety and compliance decision. CUL PV wire represents a specific, certified standard for photovoltaic cables, designed to withstand the unique environmental and electrical demands of solar installations. This mark signifies that a cable meets rigorous safety requirements for use in both the United States and Canada.
1. Core Definition and Purpose
1.1 What Does "CUL PV Wire" Mean?
CUL PV wire is a photovoltaic cable that has been certified to meet the safety standards of both Underwriters Laboratories (UL) in the U.S. and the Canadian Standards Association (CSA). The "C" stands for Canada, "UL" for Underwriters Laboratories, and "PV" for Photovoltaic. This dual certification is essential for projects that must comply with electrical codes in both countries, ensuring a single product can be used across North America.
The primary purpose of this cable is to connect solar panels to other system components, such as inverters and combiners. It is engineered for outdoor use, featuring insulation and jacketing materials resistant to sunlight (UV), moisture, and extreme temperatures ranging from -40°C to 90°C.
1.2 Key Physical and Electrical Characteristics
CUL PV wire is constructed with finely stranded, tinned copper conductors to ensure flexibility and corrosion resistance. Its insulation is typically made from cross-linked polyethylene (XLPE) or ethylene propylene rubber (EPR), materials chosen for their excellent weathering and thermal properties.
From an electrical standpoint, it is rated for a maximum DC voltage of 600V or 1000V and 90°C wet or dry. A key safety feature is its double insulation, which provides an extra layer of protection against cuts, abrasion, and environmental stress.
Conductor: Tinned copper, finely stranded
Insulation: XLPE or EPR for durability
Voltage Rating: 600V or 1000V DC
Temperature Range: -40°C to 90°C
Jacket: Sunlight (UV) and moisture resistant
2. The CUL Certification Mark and Its Importance
2.1 Understanding the Certification Process
The CUL mark is not a manufacturer's claim; it is an independent verification. To earn it, a cable must pass a comprehensive series of tests defined by the UL 4703 Standard for Photovoltaic Wire. These tests evaluate flame retardancy, cold bend performance, sunlight resistance, and long-term insulation integrity.
Ongoing surveillance by the certifying bodies includes periodic factory inspections and product testing to ensure continued compliance. This process provides installers and inspectors with a high degree of confidence in the product's safety and reliability over its expected 25-year service life.
Pro Tip: Always look for the printed markings along the cable jacket. FR-CABLE engineers emphasize that a legitimate CUL PV wire will clearly display the "CUL" mark, the manufacturer's name, the wire type (e.g., PV Wire), voltage rating, conductor size, and sunlight resistance designation.
2.2 Why This Standard Matters for Solar Projects

Using CUL-listed PV wire is a fundamental requirement for code compliance under the National Electrical Code (NEC) in the U.S. and the Canadian Electrical Code (CEC). Electrical inspectors will verify the presence of the appropriate certification mark before approving an installation. This compliance is non-negotiable for system permitting and interconnection approval.
Beyond legality, it directly impacts long-term system safety and performance. Certified cables are proven to resist degradation from heat, UV exposure, and mechanical stress, reducing the risk of insulation failure, ground faults, or fire over the decades-long lifespan of a solar array.
In summary, CUL PV wire is the benchmark for safe, reliable, and code-compliant solar interconnections in North America. Specifying this certified product mitigates risk and ensures your solar investment is built on a foundation of proven safety standards.

The 5 Most Common CUL PV Wire Installation Errors
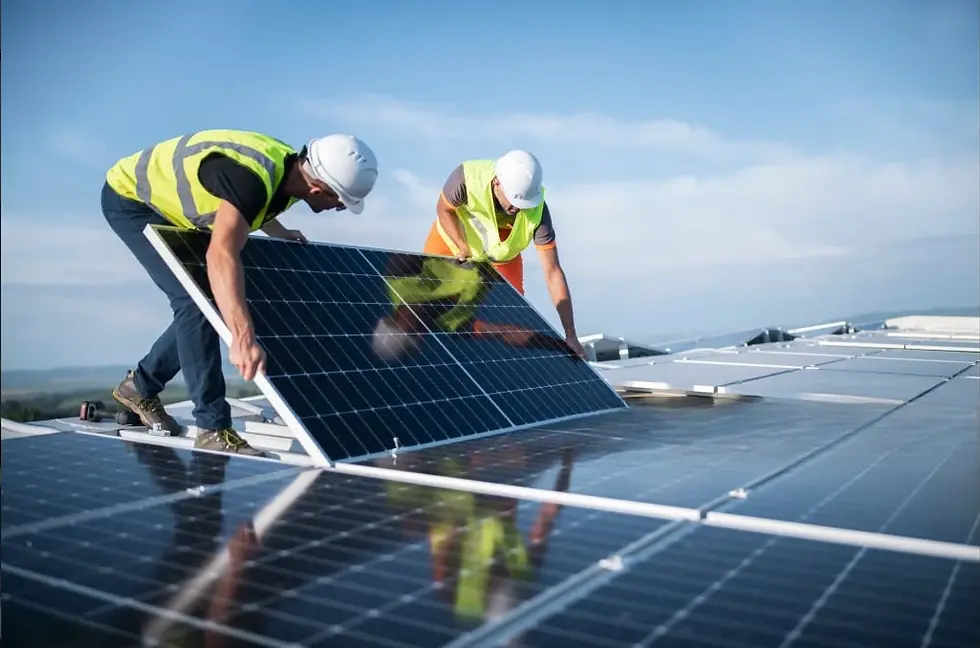
Proper installation of CUL-listed PV wire is critical for system safety, performance, and passing electrical inspection. Unfortunately, even experienced installers can make subtle mistakes that compromise the cable's integrity and violate the National Electrical Code (NEC). This section details the five most frequent errors, their code violations, and the serious consequences they can cause.
1. Incorrect Conductor Termination and Torque
1.1 The Problem of Under/Over-Tightening
Applying incorrect torque to terminal lugs is a widespread issue. Under-tightening creates a high-resistance connection, leading to excessive heat buildup and potential arcing. Over-tightening can strip threads or crush the conductor, weakening the connection point.
This directly violates NEC 110.14, which requires terminals and connectors to be installed according to the equipment manufacturer's instructions to ensure a reliable, low-resistance connection.
1.2 Consequences and Inspection Failure
The primary consequence is a fire hazard due to thermal runaway at the connection. An inspector will check for signs of overheating, such as discoloration or melted insulation. Using a calibrated torque wrench is non-negotiable for compliance.
High-resistance connection points
Localized insulation degradation
Failed thermal scan during inspection
2. Improper Cable Support and Strain Relief
2.1 Inadequate Spacing and Securement
Failing to properly support PV wire runs is a common oversight. NEC 338.10(B)(4)(b) requires Type PV wire to be secured at intervals not exceeding 4.5 feet and within 12 inches of every junction box. Loose cables are susceptible to physical damage and wind-induced abrasion.
This strain can pull on terminations, loosening connections over time and exposing conductors.
2.2 Abrasion and Long-Term Damage
Without proper support, cables can rub against mounting hardware or roof penetrations. This abrasion wears through the sunlight-resistant (SR) jacket, exposing the insulated conductors to UV degradation and moisture ingress, leading to premature failure.
3. Exceeding Temperature Ratings at Connections
3.1 Ignoring Ambient Temperature Factors
CUL PV wire has a 90°C wet or dry rating, but termination points often have a lower temperature rating, typically 75°C. A critical error is routing cables near heat sources or failing to apply ambient temperature correction factors from NEC Table 310.15(B)(1).
This causes the termination point, not the wire itself, to become the system's thermal weak link.
3.2 The De-Rating Violation
Operating a 75°C rated terminal at a higher temperature violates its listing (NEC 110.3(B)). The consequence is accelerated oxidation of metal contacts and insulation breakdown at the terminal, creating a hidden failure point that may not be visible during a standard visual inspection.
Pro Tip: FR-CABLE's technical support team consistently finds that installers overlook terminal temperature ratings. Always verify the temperature rating of the entire connection point, not just the wire, especially in rooftop environments where temperatures can exceed 70°C.
4. Wrong Use of Cable Ties and Fasteners
4.1 Non-UV Rated and Over-Tightened Ties
Using standard nylon cable ties is a frequent mistake. PV wire installations require ties that are UV-resistant and sunlight-stabilized to prevent brittleness and cracking. Furthermore, overtightening ties can deform the cable jacket, compromising its integrity.
This violates the cable's listing by applying point pressure that the jacket was not designed to withstand.
4.2 Material Compatibility Issues
Using metal fasteners without proper grommets or edges can cut into the cable. The consequence is a compromised insulation system, allowing moisture ingress and creating a direct path to ground. Inspectors will look for proper, listed cable management accessories.
5. Inadequate Protection at Roof Penetrations
5.1 Missing or Improper Bushings
Running PV wire through a metal conduit body or roof penetration without a listed bushing is a critical error. The sharp edges of the knockout can slice into the cable jacket during thermal expansion/contraction or movement. NEC 300.4(G) mandates protection against abrasion.
This omission leaves the cable vulnerable to the elements and physical damage.
5.2 Water Ingress and Corrosion Pathway
The consequence is a direct entry point for water. Once inside the jacket, water can travel along the conductors, leading to corrosion, ground faults, and reduced insulation resistance. This often results in intermittent system faults that are difficult to diagnose.
Common Error | NEC Code Violation | Primary Consequence |
Incorrect Torque on Terminations | 110.14 | High-resistance connection & fire hazard |
Improper Cable Support (>4.5 ft spacing) | 338.10(B)(4)(b) | Cable strain, abrasion, and damage |
Exceeding Terminal Temperature Rating | 110.3(B) | Insulation breakdown at connection point |
Use of Non-UV Rated Cable Ties | 110.3(B) (Violates Listing) | Jacket damage and premature failure |
No Bushings at Penetrations | 300.4(G) | Abrasion, cuts, and water ingress |
Avoiding these five errors requires meticulous attention to the NEC, the cable manufacturer's instructions, and the specifications of all connected components. The next section will outline the best practices to ensure a safe, compliant, and durable installation.

How to Properly Size and Select CUL PV Wire for Your System
Correctly sizing your photovoltaic wire is critical for system safety, efficiency, and compliance. This guide walks through the key calculations and considerations, referencing the National Electrical Code (NEC) to help you avoid common sizing mistakes and ensure a reliable installation.
1. Preparation and Key Definitions
1.1 Required Tools and Information
Before starting calculations, gather your system's electrical parameters and reference documents. You will need the maximum system current, circuit voltage, and total one-way circuit length.
Essential tools include the NEC Article 690 for solar PV systems, the NEC Ampacity Tables (like Table 310.15(B)(16)), and a voltage drop calculator.
1.2 Understanding Ampacity and Temperature
Ampacity is the maximum current a conductor can carry continuously under its conditions of use. For PV wire, this is heavily influenced by ambient temperature and installation method.
The NEC requires applying correction factors for temperatures above 30°C (86°F). A common mistake is using the base ampacity without adjustment, which can lead to dangerous overheating.
2. The Step-by-Step Sizing Guide
2.1 Step One: Calculate Minimum Ampacity
First, determine the minimum conductor ampacity. Start with the module's maximum current ( multiplied by 1.25 per NEC 690.8(A)(1)). Then, apply any continuous-use and temperature correction factors.
For example, if your calculated current is 40A and you have a 45°C ambient temperature, you must select a wire whose temperature-corrected ampacity exceeds 40A, not just its base rating.
2.2 Step Two: Perform Voltage Drop Calculation
Voltage drop reduces system efficiency. The NEC recommends keeping it below 3% for feeder circuits and 2% for branch circuits. Use this formula: VD = (2 x L x I x R) / 1000, where L is one-way length in feet, I is current, and R is conductor resistance.
Pro Tip: FR-CABLE engineers often recommend oversizing by one gauge for long DC runs to minimize voltage drop losses, which can improve annual energy yield more than the marginal cost increase.
2.3 Step Three: Verify Against Physical and Code Requirements
Finally, ensure your selected wire size meets all physical and code constraints. Check the minimum size requirements for your overcurrent protection device and verify the conductor fits in the terminals of your listed equipment.
Confirm wire fits inverter and combiner box terminals
Verify ampacity exceeds overcurrent device rating
Ensure selection is listed for wet locations and sunlight resistance
Check for any local amendments to the NEC
3. Common Reference Data and Pitfalls
3.1 Ampacity Chart Reference
Below is a simplified reference based on NEC Table 310.15(B)(16) for common CUL PV wire types at 90°C in a 30°C ambient. Always consult the full NEC for final design.
Example Ampacities (90°C Copper, 30°C Ambient): 10 AWG = 40A, 8 AWG = 55A, 6 AWG = 75A, 4 AWG = 95A. Remember, termination temperature ratings often limit you to the 75°C column values.
3.2 Mistakes to Avoid
Ignoring temperature de-rating is the most frequent error. A 10 AWG wire rated for 40A at 30°C may only be rated for approximately 34A in a 50°C rooftop environment.
Other pitfalls include neglecting voltage drop on long runs, using the wrong ampacity table, and forgetting that the 1.25 multiplier applies to the source circuit current.
By following this methodical process, you can confidently select the correct CUL PV wire, ensuring a safe, compliant, and high-performing solar array.
CUL vs. Non-Certified PV Wire: Key Differences for Inspectors
For inspectors and installers, the distinction between CUL-certified and non-certified photovoltaic wire is not just a technicality—it's a critical safety and compliance checkpoint. The CUL mark signifies that the wire has undergone rigorous, standardized testing for the demanding North American solar environment. Understanding these differences is essential for ensuring system longevity and passing inspection.
1. The CUL Mark: A Seal of Verified Performance
1.1 What the CUL Mark Guarantees
The CUL mark indicates certification by Underwriters Laboratories (UL) for the Canadian market, meeting the stringent requirements of the UL 4703 Standard for Photovoltaic Wire. This certification is harmonized with US requirements, making it widely accepted. It verifies that the wire's materials, construction, and performance have been independently tested and are subject to ongoing factory surveillance.
Inspectors look for this mark because it provides a reliable, third-party assurance of quality that generic wire specifications cannot match.
1.2 Key Performance Attributes Tested
CUL certification mandates specific tests that directly impact field performance and safety. These include evaluations for sunlight (UV) resistance, wet location operation, and flame retardancy. For instance, the sunlight resistance test involves prolonged exposure to intense UV radiation to prevent premature jacket cracking.
Non-certified wire may claim similar properties but lacks the verifiable, repeatable test data that the CUL process provides, leaving its long-term durability in question.
Pro Tip: Always verify the wire's printing. A genuine CUL mark will be accompanied by the standard (e.g., UL 4703), voltage rating, conductor size, and temperature rating. FR-CABLE emphasizes that inspectors should treat any wire missing this complete printed information as suspect until proven otherwise.
2. Material and Construction Contrasts
2.1 Insulation and Jacket Quality
CUL-certified PV wire uses cross-linked polyethylene (XLPE) or similarly rated insulation designed for 90°C wet and 125°C dry ratings. The jacket compound is specifically formulated for extreme environmental exposure. In contrast, non-certified wire often uses lower-cost, non-crosslinked materials like PVC or inferior polyethylene blends.
These substandard materials can become brittle and crack after a few years of UV exposure, leading to insulation failure and potential ground faults or fire hazards.
2.2 Conductor and Durability Standards
The conductor within CUL wire is typically tinned copper, which provides superior corrosion resistance—a critical factor for long-term reliability in outdoor, high-humidity environments. The standard also specifies strict requirements for conductor stranding and overall flexibility to withstand installation stresses and thermal cycling.
Non-certified alternatives may use bare copper or inferior tinning, increasing the risk of oxidation and increased resistance at connection points over time.
3. The Inspector's Checklist: Why Certification Matters
3.1 Compliance with NEC and Local Codes
The National Electrical Code (NEC) is clear on the requirements for photovoltaic systems. NEC Article 690.31 specifies that PV system wiring must be listed for the application. For inspectors, the CUL/UL mark is the primary evidence that the wire meets this code-mandated "listed" requirement.
Using non-certified wire creates an immediate code violation, jeopardizing the entire system's approval and potentially voiding insurance coverage.
Recommending or approving non-certified wire shifts significant liability onto the inspector and installer if a failure occurs.
Feature | CUL-Certified PV Wire (UL 4703) | Non-Certified / Generic Wire |
Certification Mark | Clearly printed CUL (or UL) mark with standard number | No independent certification mark; may have generic ratings |
Sunlight Resistance | Mandatory UV testing per standard; verified for 20+ years | Not verified; material may degrade in 3-5 years |
Wet Location Rating | Rated for 90°C in wet conditions (e.g., conduit) | Often only rated for dry locations or lower temperatures |
Code Compliance | Meets NEC 690.31 requirement for "listed" wire | Does not meet NEC listing requirement; fails inspection |
Material Quality | Tinned copper conductor; cross-linked (XLPE) insulation | May use bare copper and lower-cost PVC or PE blends |
Ultimately, the CUL mark provides inspectors with a clear, defensible standard for approval. It separates proven, code-compliant products from those that pose an unacceptable risk to system safety and performance.
Step-by-Step Guide to a Pre-Inspection CUL PV Wire Checklist
A final, official inspection can be a high-stakes moment for any solar installation. A proactive self-audit is your best defense against costly callbacks and delays. This actionable checklist provides a systematic, step-by-step guide to verify your CUL PV wire installation is inspection-ready, turning a potential failure point into a mark of professional quality.
1. Preparation and Documentation Review
1.1 Verify Wire and Component Specifications
Before touching a single wire, confirm all materials match the approved plan. Cross-reference the CUL PV wire part numbers on-site with the project specifications and manufacturer's datasheets. Ensure the wire's voltage rating, conductor size, and temperature rating are correct for the system design and local climate.
Pay special attention to the cable's markings. Legible print indicating UL 4703 listing, wire gauge, and voltage rating must be visible along its length.
1.2 Organize Required Compliance Documents
Inspectors will request key documentation. Have these items readily accessible in a dedicated folder or digital tablet. This demonstrates organization and speeds up the approval process.
System design schematics and single-line diagrams
Manufacturer specification sheets and CUL listing certificates
Equipment cut sheets for inverters, combiners, and disconnects
Local permit and approved plan set
2. Physical Installation Audit
2.1 Inspect Routing and Support
Walk the entire wire run, checking for proper support and protection. Verify conduit is securely fastened at intervals not exceeding the NEC-mandated distance (typically 3 feet for horizontal runs). Ensure there are no sharp bends that exceed the cable's minimum bending radius, which can damage internal conductors.
Check that wires are protected from physical damage and are not in contact with roof edges, abrasive surfaces, or potential pinch points.
2.2 Check Terminations and Connections
This is a critical failure point. Ensure all terminations inside junction boxes, combiners, and inverters are torqued to the manufacturer's specification. Loose connections are a primary cause of heat buildup and system failure.
Pro Tip: FR-CABLE field engineers recommend using a calibrated torque wrench for final terminations. A visual check for stray strands and proper use of ferrules on fine-stranded conductors can prevent arcing and ensure a reliable, long-term connection.
3. Final System Verification
3.1 Perform Visual and Electrical Checks
Conduct a final visual sweep for any missed issues like damaged insulation or incorrect labeling. Then, with the system safely de-energized, perform continuity and insulation resistance tests using a megohmmeter to verify circuit integrity and isolation.
This step confirms there are no shorts, grounds, or compromised insulation that could fail under operational voltage, which for PV arrays can be 600V to 1500V DC.
3.2 Confirm Labeling and Safety Signage
All disconnect switches, junction boxes, and inverters must be clearly and permanently labeled according to NEC Article 690. Verify that “WARNING: PHOTOVOLTAIC SYSTEM” and voltage/current ratings are present. This is not just for compliance; it's critical for future service and firefighter safety.
PV system disconnect switches at the array and building entrance
All junction boxes and combiners indicating source circuits
Inverter AC and DC disconnects with system ratings
By methodically working through this pre-inspection checklist, you transform the final inspection from a stressful exam into a simple formality, ensuring a smooth pass and a safe, reliable solar installation.
CUL PV Wire FAQs: Your Top Inspection Questions Answered
Even with a solid understanding of CUL PV wire specifications, field inspectors often encounter specific, practical questions. This section addresses common queries directly related to inspection scenarios, providing clear answers to ensure compliance and system integrity.
1. Visual Inspection Red Flags
1.1 What Constitutes "Excessive" Sunlight Damage?
While UV-resistant, prolonged direct exposure can degrade the cable jacket. Look for chalking, cracking, or significant discoloration that exposes the insulation beneath. Minor fading is acceptable, but any physical compromise to the jacket integrity is a fail point per UL 4703.
Focus on sections without conduit protection and areas near reflective surfaces, as these experience amplified UV stress.
1.2 Can I Reuse CUL PV Wire from a Decommissioned Array?
Generally, no. The wire's history is unknown, and it may have sustained hidden mechanical stress or UV degradation. NEC Article 690.31(B) requires conductors to be listed for the application and in good condition.
Reusing old wire voids the UL listing and introduces significant liability. Always install new, certified wire for any permanent PV installation.
2. Installation & Compliance Clarifications
2.1 Is Conduit Always Required for CUL PV Wire?
Not always. CUL PV wire is rated for exposed outdoor use (USE-2 rating), meaning it can be run in free air, along racks, or in cable trays. However, local codes or specific site conditions (like high-traffic areas or risk of physical damage) may mandate conduit.
Always cross-reference the product listing with the latest NEC Article 690 and local Authority Having Jurisdiction (AHJ) requirements.
2.2 How Do I Verify the Temperature Rating in the Field?
The temperature rating is permanently printed on the cable jacket, typically as "90°C Wet or Dry" or similar. This is a mandatory marking per the UL standard. If the marking is illegible or absent, the wire cannot be verified as compliant.
Pro Tip: FR-CABLE's inspection checklist includes verifying this printed rating before installation begins, as it directly impacts ampacity calculations and system safety.
3. Testing and Documentation
3.1 What Documentation Proves CUL Compliance?
You need the manufacturer's certification and the wire itself. The proof is twofold: the UL Mark (often "C-UL US") on the cable jacket and the corresponding UL Product IQ report online.
Key items to check in documentation include:
The exact product name/number matching the reel label
A valid file status (not closed or suspended)
Compliance with the latest UL 4703 standard revision
By addressing these focused questions, inspectors can move forward with greater confidence, ensuring every installation meets the high safety standards required for solar energy systems.


Comments