Solar Panel Connector Types: MC4 (Universal), MC3, Tyco & More (Complete Guide)
- Vicky

- May 6
- 8 min read
Solar panel connectors are the small components that quietly make a PV system practical. They let installers build strings quickly, replace modules without rewiring the whole array, and maintain connections in harsh outdoor conditions.
In most modern systems, you’ll encounter Universal Solar Connectors (often discussed as the MC4-style / universal PV connector family). But older installations and some manufacturers still use proprietary or legacy connector families—like MC3, T4, Tyco/TE Solarlok, and Radox.
This guide explains what solar connectors are, why they matter, how major connector types differ, and—most importantly—how to avoid mismatch problems when repairing or replacing connectors.

Key Takeaways
Universal Solar Connectors (MC4-style) are the most common “industry standard” family for PV strings.
MC3 is older and often replaced because connector designs and sealing/locking can be less reliable over time.
Tyco/TE Solarlok, T4, and Radox are different connector systems—compatibility is not guaranteed just because something “looks similar.”
When replacing connectors, match not only the outside shape—match the connector family/generation and the exact replacement parts (contacts/pins, housings, seals, and backshell/strain relief where applicable).
A correct crimp and properly seated seals are often more important than the connector brand.
What Is a Solar Panel Connector?
A solar panel connector is the weather-resistant device used to establish a secure electrical connection between:
solar modules (panel-to-panel or panel-to-string),
and other PV system components such as charge controllers, inverters, or combiner boxes (depending on system design).
A connector’s job is to:
Transfer electrical current efficiently (low-resistance connection),
Maintain a safe, sealed interface in outdoor conditions,
Reduce installation and service time by enabling plug/unplug connections instead of hard-wiring.
Most connector families provide male and female versions to preserve polarity (positive/negative) and prevent reverse connection.
Practical note: connectors are DC-rated, because PV arrays operate on DC current. That affects how connectors are designed and tested.
Why Are Connectors Important For Solar Panels?
Connectors aren’t just “convenience parts.” They directly influence safety and system longevity.
1) Electrical efficiency and power loss
If a connector interface has poor contact or is partially engaged, it can increase resistance and create localized heating—reducing performance and potentially shortening component life.
2) Safety: arcing and short-circuit risk
PV systems can produce high DC current. If connectors are not designed/assembled to mate properly and lock securely, the system is more vulnerable to:
arcing at the interface,
intermittent contact (which can worsen over time),
and damage during maintenance.
3) Weather resistance and sealing integrity
Even if the connector is “waterproof” in marketing terms, outdoor reliability depends on:
correct assembly,
correct seals,
and good strain relief (so cable movement doesn’t stress the seal or crimp).
A connector that fails its sealing function can allow moisture in, accelerating corrosion and connection degradation.
4) Long-term durability
Many PV systems target service lives on the order of decades, so a connector intended for PV use should be built to survive:
UV exposure,
thermal cycling,
moisture/humidity,
mechanical vibration.
5) Scalability and maintainability
Connectors make it feasible to:
expand arrays later,
replace a damaged module,
service a string without rewiring everything.
What Types of Connectors Are Used For Solar Panels?
Below are the connector types readers most often encounter in the field or in replacement projects.

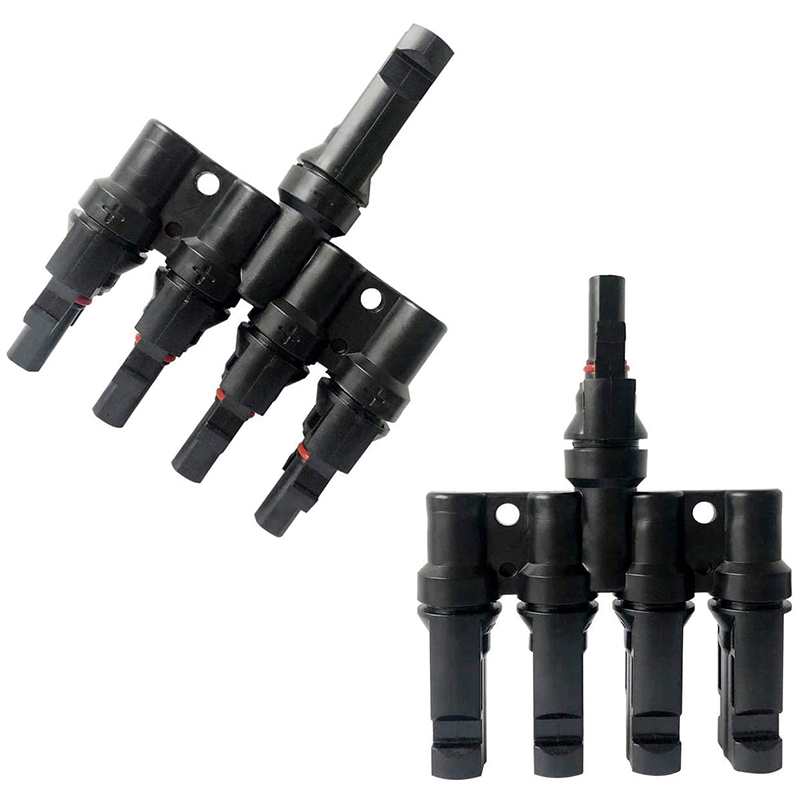
Universal Solar Connectors (MC4-style): The industry standard
Universal Solar Connectors are the dominant connector family in modern PV installations. They typically feature:
a push-in and lock mechanism designed to resist accidental separation,
weatherproof and UV-resistant housing materials,
a system designed for field-friendly installation with purpose-built crimp contacts and tools.
Male and female versions help ensure correct polarity mating (positive to positive, negative to negative).
Important: “Universal” doesn’t mean “universal between every brand.” It usually means a widely adopted connector family with shared design conventions. Always verify compatibility with part numbers or manufacturer guidance.

MC3: an older generation
MC3 connectors are legacy solar connectors that appeared widely before newer universal/MC4-style designs became standard.
Common practical reasons MC3 gets replaced:
older snap-lock designs may be less secure long-term,
sealing performance and connector wear can become issues over time,
replacement availability can become harder as systems age.
If you’re servicing an older array, MC3 inspection is worth considering—especially if there’s visible wear, corrosion, or intermittent string faults.
T4 connectors
T4 connectors are another PV connector system, commonly discussed as an alternative design family.
What to know (without guessing specs):
Some T4 designs aim to improve ease-of-use compared to older styles.
Compatibility still depends on the exact T4 connector system and replacement part set.
If you’re considering switching connector families, treat it like a system change: verify cable size, contact type, sealing parts, and compatibility.

Tyco / TE Connectivity Solarlok (Tyco Solarlok)
Tyco Solarlok refers to a connector system made by TE Connectivity (formerly Tyco Electronics).
In the field, users choose Solarlok for reasons like:
robust materials and weather resistance,
locking features intended to improve safety during operation and maintenance.
However, Solarlok connectors may differ in geometry and mating design from MC4-style systems. So you should not assume MC4-style connectors can mate reliably with Solarlok components unless you have explicit compatibility confirmation (adapter kit or manufacturer-stated pairing).

Radox connectors
Radox connectors, manufactured by HUBER+SUHNER, are another PV connector system known for rugged performance in harsh environments.
Typical field considerations:
connector mating and locking are system-specific,
crimping practices and replacement parts (contacts, housings, seals) must match the Radox connector type and cable size,
and compatibility depends on the exact Radox series.
Key Differences: Compatibility, Ratings, and Sealing
Most “connector comparison” charts online get one thing right (connector names), and miss what matters (compatibility + correct installation).
Here’s a safer way to compare connector families:
Featured snippet-ready: How to compare solar connector types safely
When comparing solar panel connector types, check in this order:
Connector family and generation
Are you replacing the same connector system (e.g., MC4-style vs MC3 vs Solarlok vs Radox)?
Cable cross-section support (mm²)
Confirm the connector’s supported conductor size matches your PV cable (commonly 2.5 / 4 / 6 mm² in many systems).
Crimp contact type and correct tool
The contact/pin is the electrical interface—use the specified crimp die/tool for that connector system.
Sealing method and parts
Ensure the correct seals/glands/strain relief are included and installed correctly.
Locking mechanism reliability
Confirm the connector fully engages and cannot separate accidentally under vibration.
DC and environmental ratings (from the datasheet/markings)
Use the product marking or datasheet—not approximate assumptions.
If you can’t verify a specification for the exact part number, the safest approach is to replace with the same connector system and matched replacement kit.
Compatibility & Replacement Rules (Avoid Costly Mistakes)
Rule 1: “Looks similar” is not compatibility
PV connectors can share general traits (plug-like shape, male/female form, outdoor materials), but mating and locking behavior can differ enough to cause:
partial engagement,
poor electrical contact,
sealing failures,
and intermittent DC problems.
Rule 2: Replace connector families end-to-end when possible
If you’re repairing a section of cable, you can sometimes replace a connector piece-by-piece. But if you’re unsure about compatibility, switching connector systems in the same string can create hidden failure paths.
Rule 3: Replace what matters: pins/contacts, housings, and seals
A reliable replacement typically needs the correct set of parts, such as:
crimp contacts/pins (electrical interface),
male/female housings (mating + polarity control),
backshell/strain relief (mechanical support),
and seals/gaskets (weatherproofing).
If you keep old seals that have been disturbed or worn, water ingress risk increases.
How to Connect Solar Connector Wires (Crimp + Lock)
Below is a field-style workflow that applies to many Universal/MC4-style connectors. Always defer to the connector manufacturer instructions for your exact part number and cable size.
Step-by-step: Attaching and crimping a Universal/MC4-style connector
Safety firstWork with the system de-energized (follow your local safety procedures).
Gather the right tools and parts
wire stripper
connector-specific crimp tool (and correct die)
Universal/MC4-style housings (male and female)
connector crimp pins/contacts for your cable size
sealing gland/seal/backshell parts that come with the kit
Strip the cable insulationStrip only to the connector manufacturer’s required length. Over-stripping can damage strands or prevent proper sealing.
Slide on sealing components (before crimping)If your connector uses a sealing gland or similar part, install it on the wire before the crimp contact goes on.
Crimp the contact/pin onto the conductorInsert the stripped conductor into the crimp contact. Use the correct crimp die and perform a full crimp cycle.
Inspect the crimpConfirm the conductor is properly captured and there’s no obvious damage to strands.
Insert the contact into the correct housingPush until the contact locks into place. If it doesn’t feel like a confident engagement, stop and re-check.
Install and tighten the sealing gland/backshellSeat the seal correctly so it compresses properly and provides weather protection at the cable entry.
Mate and verify lockingConnect male to female. You should feel the lock engage and be confident the connector cannot accidentally pull apart.
Locking and unlocking (important for service work)
Many PV connector families require a specialized unlocking tool/spanner to disengage the lock without damaging the interface or seals.
Practical guidance:
Keep the correct unlocking tool for your connector family on hand.
Avoid forcing separation—if it won’t unlock, the lock likely needs the correct tool to release safely.
Troubleshooting: Common Connector Problems
Even with the right connector type, problems can happen. Here are the most common ones:
Loose fit or poor retention
Symptoms: connector halves feel loose, don’t fully click/lock, or separate under gentle tug.Likely causes: wrong contact/pin, wrong cable size support, incorrect crimp, or damaged mating surfaces.
Poor sealing / water ingress
Symptoms: corrosion at the cable entry, green/white residue, moisture inside housings.Likely causes: seals not installed, seals damaged, improper assembly order (sealing parts not slid on before crimp), or missing strain relief support.
Corrosion and intermittent DC
Symptoms: string faults, intermittent performance, higher heat at connectors during operation (if you have thermal inspection capability).Likely causes: compromised sealing, degraded contacts, or mating that wasn’t properly locked.
Using mismatched connectors in the same string
Symptoms: inconsistent behavior, difficult service, and connectors that “half-mate.”Likely causes: mixing connector systems or generations without verified compatibility.
FAQ
1) Are MC4 and Universal Solar Connectors the same?
In most contexts, “Universal Solar Connectors” refers to the widely used MC4-style PV connector family. Exact compatibility still depends on the connector system/generation and part numbers.
2) Can I mix MC3 and MC4 connectors?
Generally, you should not assume compatibility. MC3 and MC4-style connectors are different systems, and mixing parts can lead to unreliable mating or sealing unless you use an explicitly compatible adapter/kit.
3) What matters most when replacing a solar connector?
Match the connector family/generation and use the correct replacement kit for your cable size—especially crimp contacts/pins, housings, and seals.
4) Do I need a special crimping tool?
Yes. PV connectors rely on precise contact compression. A random crimp tool often produces poor electrical contact or sealing problems.
5) Do solar connectors have IP67 ratings?
Many PV connectors are marketed with strong water/dust protection (often IP-related), but the exact rating depends on the specific connector model and correct assembly. Always confirm from the product marking/datasheet.
6) What’s the best connector type for long-term reliability?
In practice, “best” usually means: the connector family you can install correctly with the right tools, seals, and replacement parts—and that matches your PV cable size and system requirements.
Conclusion
Solar panel connectors are a core PV component because they combine electrical connection with outdoor reliability. The connector type you choose matters—but so does how you install it.
If you want the simplest path to dependable results, standardize on the connector family used in your system (commonly MC4-style / Universal Solar Connectors) and replace with matching parts for your cable size, using the correct crimp tool and sealing/locking method.
That approach avoids the most common failure pattern in the field: connectors that mate “good enough” but don’t lock, don’t seal, or fail early under weather and vibration.


Comments