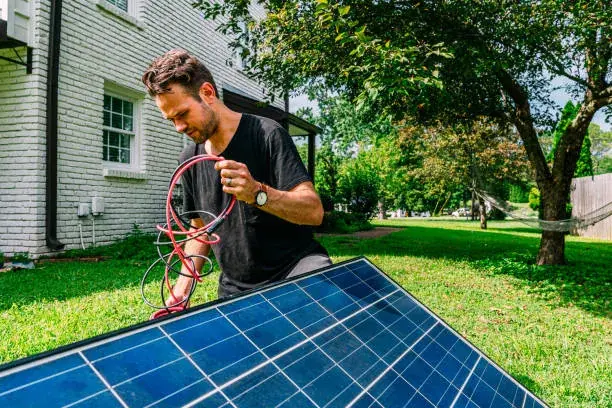
DIY Solar Wiring: A Step-by-Step Guide for Beginners
- Waseem Raheel
- Jul 10, 2025
- 10 min read

Understanding the Basics of DIY Solar Wiring
For those embarking on a renewable energy journey, understanding the fundamentals of DIY solar wiring is crucial. This process involves connecting solar panels, batteries, and controllers to convert sunlight into usable electricity. Familiarity with basic electrical principles will empower you to create an efficient solar system that meets your energy needs. With some planning and the right tools, anyone can tackle this exciting project.
By collecting these tools beforehand, you can work more efficiently and reduce unnecessary delays during your installation phase.
Component | Function |
Generates electricity from sunlight | |
Charge Controller | Regulates incoming energy to prevent battery overcharging |
Battery | Stores energy for later use |
Safety Precautions in DIY Solar Wiring
When handling electrical components in DIY solar wiring, it’s critical to prioritize safety. Always disconnect power before working on your system. Additionally, using appropriate protective gear will minimize risks during installation. Consider these safety measures:
Wear safety goggles and gloves.
Ensure your workspace is dry and organized.
Double-check all connections before powering on the system.
“Proper preparation and safety are the keys to a successful DIY solar wiring project.”
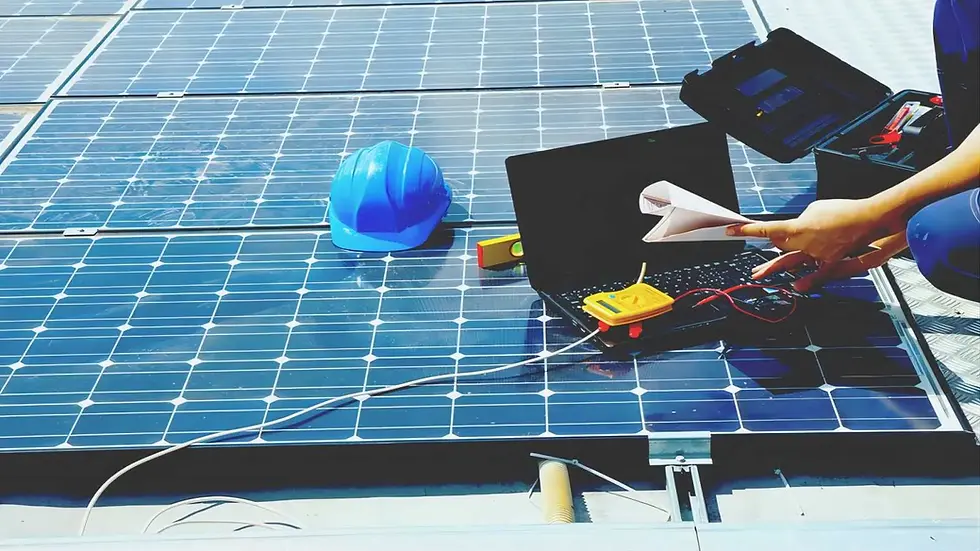
Essential Tools and Materials for Your DIY Solar Wiring Project
Embarking on a DIY solar wiring project can be fulfilling and beneficial for both the environment and your energy bills. To get started, the right tools and materials are essential for success. Having a well-organized workspace along with these essentials will streamline your DIY solar wiring process and ensure you can tackle tasks efficiently. Begin with the most fundamental components, such as solar panels, charge controllers, and batteries of appropriate size and capacity for your setup. Here is our full list of products.
Tools You'll Need
To ensure a smooth DIY solar wiring experience, gather the necessary tools. You'll need wire strippers, a multimeter, a drill, and screwdrivers of various sizes to handle different screws and components. A soldering iron is also vital for making electrical connections reliably, while safety gear like gloves and goggles is non-negotiable to prevent accidents.
Materials for the Wiring
When it comes to materials, focus on high-quality components to ensure optimal performance and longevity of your DIY solar wiring project. Invest in thick gauge solar cables to minimize energy loss and connectors that fit securely. Additionally, you'll need fuses and circuit breakers for safety, along with mounting brackets for your solar panels.
Solar panels
Charge controllers
Batteries
Wiring and connectors
Fuses and circuit breakers
Incorporating reliable materials will enhance the overall efficiency of your system and safeguard its functionality.
Tool/Material | Purpose |
Wire Strippers | To strip insulation from wires |
Multimeter | For measuring voltage and current |
Soldering Iron | To create reliable electrical connections |
Cables | To connect components |
Safety Tips
Never rush through your DIY solar wiring project. Always prioritize safety by double-checking connections and ensuring the area is clear of moisture. If uncertain during any step, consult online resources or experts, as preventing accidents is vastly better than dealing with the consequences later.
Wear safety gear
Double-check connections
Prevent moisture exposure
“Proper preparation and safety measures are as crucial as the wiring itself for a successful DIY solar wiring project.”
Step-by-Step Guide to Planning Your DIY Solar Wiring Setup
Planning your DIY solar wiring setup can seem overwhelming, but it doesn't have to be. With a clear understanding of components and a well-laid-out plan, you can create a functional solar wiring system that meets your energy needs. Start with a comprehensive overview of what you want to achieve, as this foundation will guide you through the process smoothly. Knowing the essential components, such as panels, inverters, and batteries, is crucial in your DIY solar wiring journey. Besides this blog, we have many more blogs available here.

Understanding Your System Components
Before diving into the wiring, familiarize yourself with all components you'll use in your DIY solar wiring project. Each part plays a vital role in harnessing solar energy. This includes solar panels, charge controllers, batteries, and inverters. As you gather these materials, ensure they are compatible with each other. Understanding their functions will empower you to create a more efficient setup.
Creating Your Wiring Diagram
A wiring diagram is essential for visualizing how all components connect in your DIY solar wiring setup. Ensure you draw one before starting to avoid confusion later. Once you have your diagram ready, use it as a roadmap during the installation process.
Solar panels
Charge controller
Inverter
Batteries
Cabling and connectors
Component | Function |
Solar Panels | Convert sunlight into electricity |
Inverter | Converts DC to AC electricity |
Charge Controller | Regulates battery charging |
Batteries | Stores energy for later use |
Safety Precautions and Final Installation
As you embark on your DIY solar wiring project, always prioritize safety. Working with electricity can be hazardous; therefore, utilize protective gear and follow safety guidelines diligently.
Wear safety goggles
Use insulated tools
Ensure all connections are secure
Follow local electrical codes
“Proper planning and understanding are key to a successful DIY solar wiring project.”
Wiring Your Solar Panels: A Beginner's Approach
Starting your journey into DIY solar wiring can be both exciting and overwhelming. However, understanding the basics of solar panel wiring is essential for any beginner. This guide is designed to break down the process, making it accessible to those new to solar energy projects. Establishing a comprehensive understanding of DIY solar wiring will empower you to successfully connect and manage your solar panel setup. This is our homepage.
Essential Tools for DIY Solar Wiring
Before diving into the wiring process, gather the essential tools you'll need. Having the right equipment ensures safety and efficiency during installation. Some of the tools include a wire cutter, crimping tool, multimeter, and appropriate cables. These tools will help you manage your DIY solar wiring with ease and precision, making your experience much smoother.
Understanding Connections and Components
Each solar system comprises various components that require proper connections. Understanding these components ensures you can effectively make the necessary connections in your DIY solar wiring project. Key elements include solar panels, inverters, charge controllers, and batteries. Knowing how each component interacts is crucial for an optimal setup.
Solar Panels
Inverters
Charge Controllers
Batteries
It’s essential to familiarize yourself with these components to ensure a successful installation and long-term efficiency.
Component | Function |
Solar Panels | Generate Electricity |
Inverters | Convert DC to AC |
Charge Controllers | Manage Battery Charging |
Safety Tips for DIY Solar Wiring
Safety should always be your top priority during any DIY solar wiring project. Familiarize yourself with safety tips to avoid accidents and injuries, ensuring a successful outcome for your installation.
Wear insulated gloves.
Ensure wiring is rated for outdoor use.
Turn off all power sources before starting.
“Safety is not an option; it's a necessity when working with electricity.”
Connecting Inverters and Batteries in Your DIY Solar Wiring
When tackling DIY solar wiring, one of the most crucial steps involves connecting your inverters and batteries correctly. This step ensures that your renewable energy system functions effectively, storing energy generated from solar panels for later use. An inverter converts the DC electricity produced by the solar panels or stored in the batteries into AC electricity that powers your home. To begin your DIY solar wiring project, it is essential to have the right tools and materials, including cables, connectors, and safety gear. Each connection point must be checked to prevent any energy loss during transmission.

Understanding the Components
Familiarizing yourself with the components involved in your DIY solar wiring can simplify the installation process. The primary components include the solar panels, battery bank, inverter, charge controller, and wiring. Knowing how to configure each part will enable a more efficient solar setup. Ensure all components are compatible to avoid potential issues further down the line.
Wiring Connections Explained
The actual wiring connections should follow a clear sequence. Always ensure that safety precautions are in place, such as turning off the inverter before making connections. Connecting batteries in series or parallel will depend on your energy storage requirements. Use high-quality connectors to ensure durability and minimize resistance.
Choose appropriate cable sizes based on your system's capacity.
Secure connections with heat-shrink tubing to prevent short circuits.
Label all wires for easy troubleshooting in the future.
A well-planned DIY solar wiring project can lead to long-term energy savings and sustainability. Keep your wiring organized and practical, ensuring it conforms to standard electrical practices for safety.
Component | Purpose |
Solar Panel | Generates DC electricity from sunlight. |
Inverter | Converts DC to AC electricity. |
Battery | Stores energy for later use. |
Charge Controller | Regulates the energy flow to and from the batteries. |
Final Considerations
As you wrap up your DIY solar wiring project, remember that proper maintenance is key to maximizing efficiency. Regularly check all connections and component health to ensure optimal performance. This will help you make the most of your solar energy investment over time.
Monitor battery health frequently.
Clean solar panels to maintain efficiency.
Inspect wiring for wear or damage regularly.
“A little knowledge and diligence can turn your DIY solar wiring project into a reliable power source for years to come.”
Safety Tips for Successful DIY Solar Wiring
Taking on DIY solar wiring can be an exciting project, but safety should always come first. Ensure you are equipped with the right tools and knowledge before you start. Familiarize yourself with the necessary components and follow all safety protocols to avoid hazards. During the installation process, using protective gear such as gloves and goggles is essential to safeguard against any potential accidents, especially when working with electrical components.
Understanding Electrical Basics
Before starting your DIY solar wiring project, it's crucial to have a solid grasp of basic electrical principles. This understanding will help you accurately connect your solar panels, inverters, and batteries. Learn about voltage, amperage, and the significance of grounding to ensure a safe installation. Miscalculations can lead to short circuits or even fire hazards, so don't skip this foundational step.
Tools and Materials Needed
Having the right tools and materials will make your DIY solar wiring project smoother and safer. Basic tools may include wire strippers, a multimeter, and proper connectors. Additionally, ensure you have high-quality wiring and components that match your system’s specifications. Using subpar materials can lead to inefficiencies or safety issues.
Wire strippers
Multimeter
High-quality solar cables
Proper connectors
Protective gear
A well-organized workspace is also key. Make sure your area is free of clutter and complies with electrical codes to minimize risks.
Component | Function | Safety Considerations |
Solar Panels | Convert sunlight to electricity | Ensure proper installation angle |
Inverter | Converts DC to AC power | Keep it away from moisture |
Battery | Stores electricity | Ventilation is key to prevent gas build-up |
Follow Local Codes and Regulations
Each region has specific codes and regulations regarding solar installations, which are designed to ensure safety and efficacy. Before starting your DIY solar wiring project, research these rules thoroughly. Non-compliance can lead to legal issues and can potentially endanger your home's safety.
Research local electrical codes
Consult with a certified electrician if unsure
Obtain necessary permits prior to installation
“Safety first always ensures a successful DIY solar wiring project.”
Common Mistakes to Avoid in DIY Solar Wiring
DIY Solar Wiring can be an exciting project, but it's essential to avoid common pitfalls that beginners often encounter. One of the most significant mistakes is underestimating the importance of planning. Rushing through the design phase can lead to inefficiencies and safety hazards. Make sure to outline your wiring connections, panel placements, and load calculations before you start working on the installation.
Neglecting Safety Protocols
Safety is paramount when working with electricity. A prevalent oversight in DIY solar wiring is neglecting safety protocols. Always work with appropriate protective gear, use insulated tools, and double-check your connections. Proper grounding is also critical, as it prevents electrical shock and equipment damage.
Improper Component Selection
Choosing the wrong components can lead to a malfunctioning solar system. Ensure that your solar panels, inverters, and batteries are compatible with each other. Research the specifications and capacity of each element in your DIY solar wiring plan to ensure optimal performance.
Plan your wiring layout carefully.
Follow safety guidelines diligently.
Choose compatible solar components.
By avoiding these mistakes, you can create an efficient and safe solar setup. Understanding these common errors in DIY solar wiring will lead you to a successful installation.
Mistake | Solution |
Poor Planning | Draft a detailed wiring plan. |
Neglecting Safety | Use protective gear and follow guidelines. |
Wrong Components | Research and confirm compatibility. |
Electrical Overload
Overloading your system can lead to catastrophic failures. Always adhere to your system’s voltage and amperage ratings when designing your DIY solar wiring. Doing so protects both your equipment and your investment.
Calculate the total load accurately.
Use circuit breakers for protection.
Monitor your system regularly.
“Success in DIY solar wiring is achievable by planning thoroughly and prioritizing safety above all.”
Conclusion: Start Your DIY Solar Wiring Journey Today
If you've been contemplating creating your own energy with DIY solar wiring, now is the perfect time to start. With the increasing cost of energy and the need for sustainable solutions, setting up your solar system can provide both financial and ecological benefits. This guide has been designed to walk you through the essentials of wiring your solar setup safely and effectively, ensuring that even beginners can embark on this rewarding journey.
Understanding Components
Before diving into the wiring process, familiarize yourself with the essential components involved in your DIY solar wiring project. Understanding these parts will help you make informed decisions and execute your project efficiently. Key components include solar panels, inverters, batteries, and charge controllers, each playing a crucial role in harnessing solar energy.
Safety Precautions
Safety should always be your top priority when working on solar wiring projects. Ensure that you are equipped with the right tools and gear. It’s advisable to turn off all power sources before starting any wiring tasks to prevent accidents.
Wear safety goggles and gloves.
Ensure proper ventilation.
Use insulated tools to prevent electrical shock.
By adhering to these safety measures, you can enjoy the benefits of DIY solar wiring with peace of mind.
Component | Function |
Solar Panels | Convert sunlight into electricity. |
Inverter | Transforms DC to AC power. |
Batteries | Store excess energy for later use. |
Taking the First Step
Initiating your DIY solar wiring project doesn't have to be daunting. Assess your energy needs and start small with manageable installations. As you gain more confidence and expertise, you can expand your solar setup. With patience and dedication, you will soon enjoy the benefits of renewable energy!
Begin with a DIY solar panel kit.
Follow step-by-step instructions meticulously.
"The journey of a thousand miles begins with one step." – Lao Tzu
FAQ: Your Top Questions About DIY Solar Wiring Answered
DIY solar wiring is an empowering journey for beginners looking to harness renewable energy. Understanding the essentials not only helps save money but also contributes to sustainability. In this guide, we’ll address frequently asked questions surrounding DIY solar wiring. Get ready to learn the basics and equip yourself with the knowledge needed to get started! You can contact us anytime if you have any questions.
What tools do I need for DIY Solar Wiring?
Starting your DIY solar wiring project requires a set of specific tools to ensure safety and efficiency. Basic tools include wire strippers, screwdrivers, a multimeter for electrical testing, and safety gloves. Additionally, having a drill and various connectors handy can streamline the installation process. It’s crucial to prioritize safety while handling electrical components, so be sure to use insulated tools.
Wire strippers
Multimeter
Safety gloves
Screwdrivers
Connectors
Panel Configuration | Advantages |
Series | Higher voltage, fewer wires |
Parallel | More power if one panel is shaded |
What safety precautions should I take?
When undertaking DIY solar wiring, safety must be your top priority. Avoid working during rainy conditions or when electrical storms are forecasted. Always disconnect power sources before working on your system. It can also be beneficial to have someone assist you in case of emergencies. Familiarize yourself with electrical codes in your area to ensure compliance.
Work in dry conditions
Use insulated tools
Wear protective gear
Keep a first aid kit nearby
Investing time in learning DIY solar wiring can lead to significant savings and a positive environmental impact.


Comments